Topic: Payment Gateway

We have integrated a Payment Gateway to cater for the growing global demand for self-service and automated payment processes. This facilitates real-time digital payment processing, that not only ensures a seamless and convenient payment experience for end-customers but also empowers Syspro customers with heightened operational efficiencies, expedited collection cycles, and mitigated credit risks.

Exploring
-
Enhanced customer experience
Provides a seamless and user-friendly payment process that improves satisfaction and encourages timely payments from end-customers.
-
Operational efficiency and cost savings
Reduces manual processing time and administrative overhead, leading to increased efficiency and lower operational costs.
-
Accelerated cash flow and reduced credit risk
Offers flexible payment options that facilitate quicker settlements, shortening the collection cycle and minimizing exposure to credit risk.
Standard Payment Process:
-
Enables end-customers to settle outstanding invoices via a digital payment platform.
-
Syspro Sales Orders and Accounts Receivable processes are adapted to trigger payment requests against sales invoices in the Payment Gateway.
-
Instantaneous registration of payment requests through seamless integration between Syspro and the Payment Gateway.
-
Payments can be executed immediately by the Syspro operator or later by the end-customer.
-
Upon successful payment, the corresponding invoice balance in Syspro is automatically updated.
Reserve Payment Process:
-
Allows reservation of funds on an end-customer’s credit card against an open sales order or invoice.
-
Syspro Sales Orders processes are adapted to trigger reservation requests in the Payment Gateway.
-
Reservation requests are registered instantly through seamless integration between Syspro and the Payment Gateway.
-
Reservations can be executed immediately by the Syspro operator or later by the end-customer, securing funds on the credit card.
The programs related to this feature are accessed from the Program List of the Syspro menu:
- Program List > Accounts Receivable
- Program List > Sales Orders
An ISO currency is defined and standardized by the International Organization for Standardization (ISO) under the ISO 4217 standard. This standard assigns three-letter codes to currencies used around the world to ensure consistency and avoid confusion in international transactions.
The first two letters usually represent the country code (based on ISO 3166) and the third letter typically represents the currency name.
For example:
USD = United States Dollar
ZAR = South African Rand
In Accounts Payable, the payment currency is the currency used to pay the supplier.
In Accounts Receivable, the payment currency is the currency the customer uses to pay the company.
This currency may differ from the customer/supplier currency and company currency, in which case it is converted using the currency exchange rate as at the date and time of the transaction.
A payment gateway is a secure technology platform that facilitates the transfer of payment information between a customer, a merchant, and the financial institutions involved in a transaction. It acts as a digital bridge, authorizing and processing payments made through various channels (credit cards, debit cards, or digital wallets) by encrypting sensitive data and ensuring compliance with security standards.
In essence, it enables businesses to accept electronic payments safely and efficiently, whether online, in-store, or through integrated enterprise systems.
A Payment Gateway payment request is a tool that allows you to request a payment from an individual or a company. You can link it to one or more transactions, or even associate it with an account, like when you need to collect a deposit. The flexibility allows you to create multiple payment requests related to the same set of transactions.
A payment request consists of the following:
-
Default name, address and email of the customer
-
Details on one or more transactions that need to be paid
-
An optional amount to pay against each transaction
Each payment request is represented by a unique URL that can be emailed to your customer.
For example:
https://payments.paythem.co/pr/qCPkbmGecGZ0H2L0UUF9_JscaPz4CeMb_Edhn3sGOYLj1rsSFl5nz-5-p3z15C34
When a Payment Gateway payment is received for a payment request, that payment is matched up with the associated transaction. This ensures that the payment is allocated correctly. In case a customer tries to make another payment for the same transaction through a different payment request, our system is intelligent enough to handle it seamlessly. It will only permit payments for any remaining amounts that are due, preventing double payments for the same transaction.
Starting
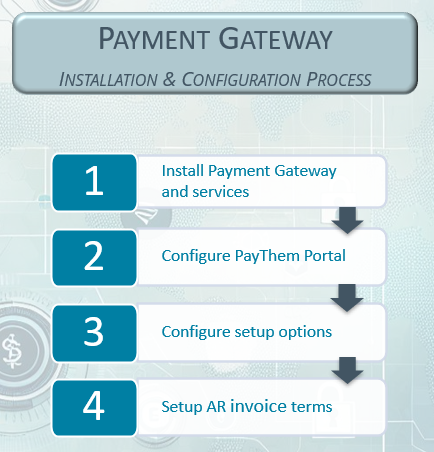
To use this feature, these components must be installed using the Syspro Installer Application:
-
Syspro 8 Connector Gateway API Service
-
Syspro Application Gateway Service
-
When installing the Syspro Application Gateway Service you are prompted to supply a valid gateway endpoint and authentication key before you can continue installing Syspro 8 2025.
-
The endpoint of the Syspro Application Gateway Service must be configured using the Setup Options program (Setup Options > System Setup > Connectivity).
-
The Payment Gateway and the services required to run it can be located on different machines.
-
To use this feature, the following must be enabled in your browser:
-
Allow Pop-Ups
Pop-ups must be allowed in your browser settings for the Syspro website to ensure the PayThem Payment window launches correctly from the Syspro Web UI (Avanti).
If pop-ups are blocked, the Payment window will not appear, and the system may seem unresponsive.
To use this feature, the following setup option(s) must be enabled/defined:
Setup Options > System Setup > Connector Gateway
-
Administration configuration
-
Connector Gateway service
Select Test connection to verify that the connection to the Syspro 8 Connector Gateway API Service is successful.
If errors are reported on first-time install, restart, or after an endpoint change, please give it a minute before attempting further troubleshooting.
-
-
Payment Gateway configuration
-
Enabled
-
Payment Gateway
-
This must be defined as PayThem, which is the only payment gateway available currently.
-
Select Run setup to launch the Payment Gateway Setup program that lets you configure the selected Payment Gateway.
-
-
To use this feature, the following must be installed according to the terms of your software license agreement:
-
PayThem Payment Gateway
You can secure this feature by implementing a range of controls against the affected programs. Although not all these controls are applicable to each feature, they include the following:
- You restrict operator access to activities within a program using the Operator Maintenance program.
- You can restrict operator access to the fields within a program (configured using the Operator Maintenance program).
- You can restrict operator access to functions within a program using passwords (configured using the Password Definition program). When defined, the password must be entered before you can access the function.
- You can restrict access to the eSignature transactions within a program at operator, group, role or company level (configured using the Electronic Signature Configuration Setup program). Electronic Signatures provide security access, transaction logging and event triggering that gives you greater control over your system changes.
- You can restrict operator access to programs by assigning them to groups and applying access control against the group (configured using the Operator Groups program).
- You can restrict operator access to programs by assigning them to roles and applying access control against the role (configured using the Role Management program).
-
The Payment Gateway license is restricted to a single environment configuration at a time. This means it cannot be simultaneously applied across multiple environments.
-
Partial payments with discounts are not supported.
If the operator selects to partially pay an invoice using the AR Payment Run program and enters a discount amount, the discount amount will be disregarded. As a result, the customer will be expected to settle the gross amount.
This limitation will be addressed in the life of Syspro 8 2025.
Solving
This notification is displayed when you are trying to access the Syspro Web UI (Avanti) (e.g. by previewing a document) .
The notification is displayed because the web application is configured to only accept connections from the local machine. While it works as expected when accessed from within the VM, external access attempts fail due to the Gateway ports (30800 & 30801) not being configured in Azure.
The Gateway ports (30800 & 30801) must be configured in Azure when the virtual machines are hosted in Azure to allow traffic to flow to and from external sources.
If the required ports are not configured, the application won't be able to communicate with public endpoints or external services, which can cause specific features or functions to fail.
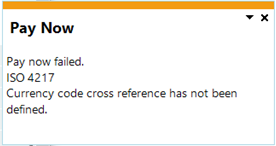
This notification is displayed in the Sales Order Entry or Dispatch Note Maintenance program when printing the invoice or dispatch note and the cross-reference between the ISO currency and the currency created within Syspro has not been established.
Assign an ISO currency to the payment currency created within Syspro using the ISO Currency Cross Reference program.
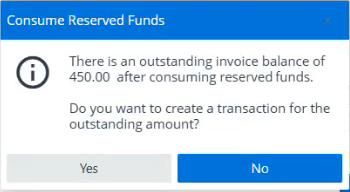
This notification is displayed in the Sales Order Entry program when you have printed the invoice for which funds were reserved and the full quantity wasn't shipped or invoiced.
The Consume Reserved Funds informational message was displayed where you have selected Yes to create a transaction for the outstanding amount, i.e. re-reserving the remaining funds for the outstanding quantity.
Follow these steps to create a new transaction for the outstanding amount:
-
Maintain the sales order in the Sales Order Entry program.
-
End the order.
The Digital Payment Reservation window will be displayed.
-
Select Reservation request to reserve the remaining funds for the outstanding quantity.
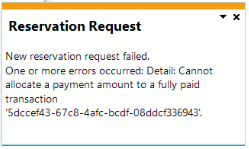
This notification is displayed in the Sales Order Entry program after printing the invoice for which funds were reserved and the full quantity wasn't shipped or invoiced, i.e. the order quantity was reduced.
Select Yes to create a transaction for the outstanding amount, i.e. re-reserve the remaining funds for the outstanding quantity.
Select No to release the remaining funds. You will then be prompted to reserve the funds when maintaining the sales order to ship the outstanding quantity.
In some cases, a Reservation Request error may be displayed after selecting Yes to create a transaction. Please refer to the workaround for steps to resolve this.
-
Access the PayThem portal.
-
Navigate to Web Hooks.
-
Select the endpoint.
A Message Attemptslistview is displayed with logs of successful and unsuccessful notification attempts made to the Syspro Payment Gateway.
-
You can filter on logs or list them according to status by selecting the All, Succeeded and Failed options.
-
Select and expand a failed attempt to view the HTTP response code which will give you an indication why the notification attempt failed.
This may be due to a number of reasons.
-
The Signing secret may need to be updated if it was refreshed in the PayThem portal.
If you refresh the secret in the portal by selecting Rotate secret from the drop-down arrow next to the Signing Secret field, then you must copy the new signing secret to the Payment Gateway Setup program to ensure that you continue receiving payment notifications.
-
You can view the PayThem notification attempts and expand a failed attempt to view the HTTP response code which will give you an indication why the notification attempt failed.
If a error is displayed against the notification attempt, the Signing secret may need to be updated.
If you refresh the secret in the portal by selecting Rotate secret from the drop-down arrow next to the Signing Secret field, then you must copy the new signing secret to the Payment Gateway Setup program to ensure that you continue receiving payment notifications.
This may be due to an incorrect or incomplete setup of the Payment Gateway.
-
Access the Payment Gateway Setup program by selecting the Run Setup option within the Setup Options program (Setup Options > System Setup > Connector Gateway).
This compares the Syspro Payment Gateway setup options with the PayThem portal information.
-
Follow these setups to ensure that the Payment Gateway delivers the expected results:
-
Enter the API key that you generated in the PayThem portal at the API key field.
You can view the key by selecting API Keys in the portal’s navigation panel but, once generated, it can't be viewed in full again.
-
Enter your company ID in the PayThem portal at the Subscription ID field.
You can obtain the company ID by selecting the User icon in the PayThem portal > Settings > Company ID.
-
Enter the Syspro company IDs in the PayThem dataset ID column in the listview.
You can obtain the company IDs by selecting Companies in the navigation panel of the PayThem portal and copying the number in the ID column for one of your companies.
-
Select the Generate Webhook hyperlink.
-
You only have to generate a webhook once, as only one SYSPRO webhook can be created.
-
A message is displayed that states that the SYSPRO webhook for PayThem was successfully created.
-
-
Enter the signing secret at the Webhook secret field.
You can obtain the signing secret by selecting Web Hooks in the navigation panel of the PayThem portal, clicking on the company and then selecting the Show/Hide eye icon at the Signing Secret field to reveal and copy the code.
If you refresh the secret in the portal by selecting Rotate secret from the drop-down arrow next to the Signing Secret field, then you must copy the new signing secret to the Payment Gateway Setup program to ensure that you continue receiving payment notifications.
-
Save your changes.
-
There are two setup options that determine to which bank the payment will be posted when processing payments from the Payment Gateway:
-
The bank account defined against to each customer using the Customers program.
-
The default bank account for the Connector Gateway operator defined at the Bank field using the Operator Maintenance program.
If banks are defined at both customer and operator level, then the bank defined within the Customers program takes precedence.
If you are reserving a payment against a sales order, the payment record itself can't be displayed in the Customer Query program, because the funds have only been reserved and not actually paid at time of sales order entry. You will see a payment record against the customer once the sales order is invoiced, as the reservation is then automatically consumed and the funds paid.
You can, however, view the status of Reserved and the amount requested at the Payment request status and Payment request amount fields in the Order header details pane within the Customer Query program.
Follow these steps to record card fees:
-
Capture the payment in Syspro.
When a customer pays via the gateway, the full gross sales amount is recorded, (i.e. not the net amount after fees).
For example:
If the customer pays R1,000 with AMEX, you record R1,000 as the payment against the invoice.
-
Record the merchant fee in Syspro.
The payment processor (e.g. TranSafe) sends a settlement report with a breakdown by card type (e.g., Visa 2%, AMEX 3.5%) directly to the Syspro business.
The merchant fee is posted as an expense to a specific GL account (e.g. Merchant Fees – AMEX or Merchant Fees – Visa).
Follow these steps to configure this in Syspro:
-
Set up the integration so that the payment transactions are posted to a Payment Gateway Cash Book.
You do this by specifying a Payment Gateway bank account against the customer at the Bank field within in Customers program.
-
When you receive the settlement report, use the Cash Book Deposits and Withdrawals program to do the following:
-
Record merchant fees
Process a withdrawal from the Payment Gateway cash book to the relevant expense GL account for the merchant (credit card) fees.
-
Record incoming funds
Process an immediate transfer from the Payment Gateway cash book to the bank account that receives the actual deposit, reflecting the cash inflow.
-
This allows you to use the Payment Gateway Cash Book to monitor the accuracy and validity of merchant fees charged.
If you forget your password, you need to with Syspro. The support team will send you a new password via email.
If you forget your PayThem password, please log a support ticket with Syspro. The support team will issue a new password via email.
In future releases, a password reset link will be available directly on the login screen.
Using
-
Install the following services using the Syspro Installer, then configure them using the Setup Options program.
-
Syspro Application Gateway Service (Setup Options > System Setup > Connectivity)
Test the connection after configuring the service.
- Syspro 8 e.NET Communications Load Balancer Setup Options > System Setup > E.Net Service Details).
-
Ensure that the services are healthy.
-
This step is only necessary if these service haven't been installed previously.
-
-
Configure the Syspro 8 Connector Gateway API Service using the Setup Options program (Setup Options > System Setup > Connector Gateway):
-
Enter the endpoint for service at the Connector Gateway service setup option, which is typically the following:
http://machine name:30835/ or https://machine name:30835/
This endpoint will be updated and automatically populated after the service is installed.
-
Select the data center within your specific geographic region at the Regional cloud data center setup option.
-
At the Payment Gateway configuration section, tick the Enabled field.
-
Save your changes.
-
-
Install the Syspro 8 Connector Gateway API Service using the Syspro Installer.
Wait approximately one minute before proceeding to ensure the service has initialized correctly.
-
Test the Syspro 8 Connector Gateway API Service using the Test connection option Setup Options program (Setup Options > System Setup > Connector Gateway)
-
Access the PayThem portal using the link received via email after the license has been issued. Configure the following by using the icons in the navigation panel:
-
Select Companies in the navigation panel to add all the companies that will use the Payment Gateway.
-
Select Company Settings in the navigation panel to add the company details.
-
Select Payment Providers in the navigation panel to add the payment methods.
-
Select Users in the navigation panel to add, edit and remove users from PayThem.
-
You can optionally configure Preferences and Notifications.
-
Select API Keys in the navigation panel and generate an API key.
Copy the generated API key and save it so you can easily access this again.
Store the API key securely as it is required during the Payment Gateway setup process. The API keys from the PayThem portal can be generated multiple times, but can only be viewed once per generation.
You can view the key by selecting API Keys in the portal’s navigation panel but, once generated, it can't be viewed in full again.
-
-
Configure the Payment Gateway using the Setup Options program (Setup Options > System Setup > Connector Gateway):
Ensure that the Syspro Application Gateway Service and Syspro 8 Connector Gateway API Service are running as the verification depends on these services.
-
The endpoint of Syspro Application Gateway Servicethat displayed at the Connector Gateway service setup option, is automatically updated after installing the service.
-
Select Run Setup to compare the Syspro Payment Gateway setup with the PayThem portal information.
The Payment Gateway Setup program is displayed.
-
Enter the API key that you generated in the PayThem portal at the API key field.
You can view the key by selecting API Keys in the portal’s navigation panel but, once generated, it can't be viewed in full again.
-
Enter your company ID in the PayThem portal at the Subscription ID field.
You can obtain the company ID by selecting the User icon in the PayThem portal > Settings > Company ID.
-
Enter the Syspro company IDs in the PayThem dataset ID column in the listview.
You can obtain the company IDs by selecting Companies in the navigation panel of the PayThem portal and copying the number in the ID column for one of your companies.
-
Select the Generate Webhook hyperlink.
-
You only have to generate a webhook once, as only one SYSPRO webhook can be created.
-
A message is displayed that states that the SYSPRO webhook for PayThem was successfully created.
-
-
Enter the signing secret at the Webhook secret field.
You can obtain the signing secret by selecting Web Hooks in the navigation panel of the PayThem portal, clicking on the company and then selecting the Show/Hide eye icon at the Signing Secret field to reveal and copy the code.
If you refresh the secret in the portal by selecting Rotate secret from the drop-down arrow next to the Signing Secret field, then you must copy the new signing secret to the Payment Gateway Setup program to ensure that you continue receiving payment notifications.
-
Save your changes.
-
-
- Setup the invoice terms for digital payments using the AR Invoice Terms program.
The following indicates areas in the product that may be affected by implementing this feature:
Accessible from the Run Setup hyperlink that is displayed at the Connector Gateway service setup option within the the Setup Options program (Setup Options > System Setup > Connector Gateway
This program lets you compare the Syspro Payment Gateway setup with the PayThem portal information.
We added the Digital payments section that lets you define invoice terms used for digital payment runs and sales order reservations.
Program List > Accounts Receivable > Setup
This program lets you define the default settlement discount you want to extend to a customer whose payments are made within a prescribed period of time and to define when an invoice becomes due for payment.
We added the Digital payments section that lets you define invoice terms used for digital payment runs and sales order reservations.
Program List > Accounts Receivable > Setup
You use this program to capture and maintain details of customers required within the system. The information captured is also used in the Customer Query program.
For this enhancement, we added the Bank field that lets you select the bank that will take the payment from the customer using the Payment Gateway. This is typically used when a specific bank is used per customer for digital payments.
The Bank field is not displayed by default and can be added by doing the following:
-
In the Syspro Desktop you can select it from the Show Captions function that is available when selecting the context-sensitive menu by right-clicking in the Customer Details pane.
-
In the Syspro Web UI (Avanti) you can add it by selecting Design Web view at the Customize gear icon. In the Add new data widget screen do the following:
-
Select the Add new icon in the Customer Details pane.
-
Select the Entry fields option and click on Customer Details.
-
Select the Bank field and click on Add field.
-
Place the field on the Customer Details pane.
-
Program List > Sales Orders > Dispatch Notes > Transaction Processing
This program lets you maintain dispatch notes. A dispatch note can be created when you end a sales order. Once created, the dispatch note may need to be changed, possibly at the request of the customer, or perhaps because you need to add freight or miscellaneous charges to the dispatch.
For this enhancement, we added the following:
-
If the invoice term is defined as Available for digital payments within the AR Invoice Terms program, the Digital Payment Reservation message box is displayed when ending the order, allowing you to pay or reserve the invoice amount.
-
If At sales order entry or Only when ready to invoice is selected at the Payment reservation options field, then you have the option to select Reservation request or Reserve now.
-
If None is selected at the Payment reservation options field, then you have the option to select Payment request or Pay now.
-
-
If you select Reservation request or Payment request at the Digital Payment Reservation message box, then the payment request URL can be displayed on the order acknowledgment or invoice for processing at a later stage.
-
To display the URL, it must be manually added onto the stationery or document template using the SRS Document Templates Maintenance or Maintain SRS Document Templates program).
-
You can also action the payment from the Sales Orders and Invoices listviews within the Customer Query program.
-
-
If you select Reserve now or Pay now at the Digital Payment Reservation message box, then the browser with the URL is displayed to process the reservation or payment immediately.
-
The Show hyperlink on the Reprint Document window launches the SRS Report Queue program from where you can open the invoice by selecting the Preview hyperlink.
Program List > Accounts Receivable > Setup
This program lets you assign an ISO currency to currencies created within Syspro using the Currency Maintenance program.
Program List > Sales Orders > Sales Order Processing
This program lets you record and maintain various types of sales orders.
For this enhancement, we added the following:
-
If the invoice term is defined as Available for digital payments within the AR Invoice Terms program, the Digital Payment Reservation message box is displayed when ending the order, allowing you to pay or reserve the invoice amount.
-
If At sales order entry or Only when ready to invoice is selected at the Payment reservation options field, then you have the option to select Reservation request or Reserve now.
-
If None is selected at the Payment reservation options field, then you have the option to select Payment request or Pay now.
-
-
If you select Reservation request or Payment request at the Digital Payment Reservation message box, then the payment request URL can be displayed on the order acknowledgment or invoice for processing at a later stage.
-
To display the URL, it must be manually added onto the stationery or document template using the SRS Document Templates Maintenance or Maintain SRS Document Templates program).
-
You can also action the payment from the Sales Orders and Invoices listviews within the Customer Query program.
-
-
If you select Reserve now or Pay now at the Digital Payment Reservation message box, then the browser with the URL is displayed to process the reservation or payment immediately.
-
When you select to print the invoice, the Digital Payments window is displayed where you can select the payment or reservation request. Once you close the Digital Payments window, the Reprint Document window launches where you can select the Show hyperlink at the Document print queue field to view the invoice containing the embedded payment request URL.
Program List > Accounts Receivable > Transaction Processing
This program lets you capture payments for multiple customers in one payment run.
For this enhancement, we added the following:
-
A Digital payment option at the Payment type field lets you indicate that you are creating a payment run for digital payments. Once this check box is enabled, you can only add a single customer to the payment run.
-
A Digital Payment drop-down with the option to request a payment, make a payment, cancel a payment request and refresh the payment status.
-
A status of 5 - Payment pending indicates that the payment has been initiated but is not fully processed or confirmed yet. This status is only used for digital payments.
Program List > Utilities
The Repair System Data utility runs various update facilities to refresh system information in Microsoft SQL Server.
For this enhancement, we added the Currencies check box that lets you import ISO 4217 currency data and generate a list of ISO currencies that must be used when linking these to existing Syspro currencies using the ISO Currency Cross Reference program.
Program List > Sales Orders > Sales Order Processing
This program lets you generate sales order documentation in batch mode.
For this enhancement, we added the Process digital payments in the Report options pane that lets you process a batch of digital payment requests. You can then view the payment request by selecting the Preview hyperlink against the invoice using the SRS Report Queue program.
The document preview functionality is always disabled when generating and processing digital payments in batch mode, as a separate window would have to be launched for every document.
Program List > Accounts Receivable > Transaction Processing
This program lets you post payments directly into the Cash Book, or generate source documents to manually post payments into the Cash Book.
For this enhancement, we added a separate entry for digital payments in the Deposit Slip and Deposit Slip - Details panes.
Program List > Accounts Receivable
This program lets you view the digital payments that have been processed and recorded in the AdmPayGateRequest table.
You can select the Details hyperlink at the Connector gateway column to launch the Connector Gateway Query program.
Accessible from the Show hyperlink at the Digital payments field within the Customer Query program.
This program lets you view digital payment run details within the Accounts Receivable module.
Accessible from the Details hyperlink at the Connector gateway column within the Payment Gateway Interface Log program.
This program lets you view API requests made by the Syspro 8 Connector Gateway API Service.
Program List > Accounts Receivable
This program lets you view data relating to your customers in the Accounts Receivable module.
For this enhancement, we added the functionality:
-
You can launch the Digital Payment Run Query program from the Query menu in the Syspro Desktop or Linked views section in the Syspro Web UI (Avanti).
-
You can process digital payment and reservation requests:
-
From the Action hyperlink in the Digital payment column of the Invoices listview pane.
You can either select Pay now to process the payment request or Cancel payment request to withdraw the payment request.
-
From the Action hyperlink in the Reserve payment column of the Sales Orders listview pane.
You can either select Reserve now to process the reservation or Cancel reserve payment to withdraw the payment reservation.
Use the Field Chooser option from the context-sensitive menu to add the Digital payment and Reserve payment columns to the listview.
-
Program List > Sales Orders
This program lets you view the latest information for sales orders captured or maintained.
For this enhancement, we added the Digital payment details section where the payment request status and amounts are displayed.
The Digital payment details section is not displayed by default and can be added by doing the following:
-
In the Syspro Desktop you can select it from the Show Captions function that is available when selecting the context-sensitive menu by right-clicking in the Customer Details pane.
-
In the Syspro Web UI (Avanti) you can add it by selecting Design Web view at the Customize gear icon and then selecting Add new.
Program List > Sales Orders > Dispatch Notes
This program lets you view dispatch note and dispatch invoice information, typically to track the status of a dispatch note.
For this enhancement, we added the Digital payment details section where the payment request status and amounts are displayed.
The Digital payment details section is not displayed by default and can be added by doing the following:
-
In the Syspro Desktop you can select it from the Show Captions function that is available when selecting the context-sensitive menu by right-clicking in the Customer Details pane.
-
In the Syspro Web UI (Avanti) you can add it by selecting Design Web view at the Customize gear icon and then selecting Add new.
The following indicates the business objects that are affected by this feature:
The AR Invoice Terms Maintenance business object lets you add, update and delete AR invoice terms.
The COM Import Programs, Activities and Esig business object lets you upload standard and custom tiles to the system-wide database. This is done as part of the minor database release.
The AR to Cash Book Integration Posting business object lets you integrate AR Payments directly into the Cash Book. It emulates all the integration functionality provided in AR Bank Deposit Slip except producing a printed bank deposit slip.
The AR Payments and Adjustments business object is used to post payments and adjustments against Accounts Receivable invoices for Syspro customers and to post miscellaneous receipts (not linked to a specific customer or invoice).
The SO Sales Order Import business object lets you add a new sales order and change or cancel an existing sales order.
Multiple orders can be passed to this object with any combination of the add, cancel and change requests. The input for each order is made up of header information and individual detail lines.
The SO Change Order Status business object lets you update the order status of existing sales orders.
The Dispatch note creation from Sales Order business object lets you create dispatch notes from sales orders.
The SO Change Dispatch Status business object lets you change the status of a dispatch note.
The SO Invoice Calculation from Sales Order business object lets you process the sales orders that are created using the SO Sales Order Import or the Sales Order Entry program.
The SO Dispatch Invoice Calculation business object lets you invoice the dispatch notes that are created using the Dispatch note creation from Sales Order business object or the Dispatch Note Review program.
The SO Dispatch Note Consolidation business object lets you consolidate dispatch notes for invoicing.
The SO Order or Order Line Cancel business object lets you process sales orders.
The SO Dispatch Note Cancel business object lets you process dispatch notes.
The SO Sales Order Query business object lets you query a sales order number or a specific sales order / invoice number combination and returns sales order header and detail line information. Archived sales orders can't be queried.
The Customer Query business object lets you view information held against a customer in the Accounts Receivable module.
The SO Dispatch Notes business object lets you query dispatch note details.
The SO List Dispatch Notes business object returns a list of selected dispatch notes when producing multiple deliveries against a sales order without producing an invoice after each delivery.
This section provides a comprehensive guide to configuring and customizing your PayThem portal, covering all available settings to help you tailor the platform to your business needs.
This functionality is not available for Syspro 8 2025
The PayThem portal uses a common list control to display lists of items. This page provides information on how to use the list controls.
Navigation
-
You can navigate through the list using the page controls at the bottom.
-
You can scroll through the list by clicking the arrows (> and <)or jump to a specific page by entering the page number.
Clicking the << arrows takes you to the first page, and clicking >> takes you to the last page.
-
You can change how many items are displayed on each page by selecting a value from the Results per page drop-down.
-
Sorting and filtering
-
To sort a column in ascending order, click on the column name. If the column is already sorted by that column, clicking again will sort it in descending order. The current sort column is indicated by a small up/down arrows icon.
-
If filters are enabled on a list, a small filter box will appear underneath the column name. Enter the value you want to filter by and use the drop-down arrow to select how that filter should be applied.
The following are currently available. Note these options depend on the type of data you are filtering.
| String Types | Description |
|---|---|
|
Contains |
The value in the filter can be found anywhere within the column field. |
|
Does not contain |
The value in the filter must not be found anywhere within the column field |
|
Equals |
The column field must match exactly with the value in the filter |
|
Does not equal |
The column field must not be the value in the filter |
|
Starts with |
The column field must begin with the value in the filter |
|
Ends with |
The column field must end with the value in the filter |
|
Empty |
Not currently supported |
|
Not empty |
Not currently supported |
| Numeric Types | Description |
|---|---|
|
Greater than |
The column field must be greater than the value in the filter |
|
Greater than or equal |
The column field must be greater than or equal to the value in the filter |
|
Less than |
The column field must be less than the value in the filter |
|
Less than or equal |
The column field must be less than or equal to the value in the filter |
|
Equals |
The column field must match exactly with the value in the filter |
|
Does not equal |
The column field must not be the value in the filter |
|
In range |
Not currently supported |
|
Not in range |
Not currently supported |
Column filters, sort orders, and page selections are persisted, which means the list will remember your previous settings if you navigate away from the screen and return to the list later.
This allows you to enter your own company information. This is shown in on the customer payment screens, to give confidence to your customers that they are paying your company.
To add a company details follow these steps:
-
Launch the PayThem dashboard.
-
Navigate to Company Settings.
-
Enter your company details on the Company Details tabs.
When adding a website, the website address must include http:// or https://.
-
The Level 2&3 Information tab is specifically for North America. These settings unlock significant cost savings through reduced interchange fees on payment transactions by providing detailed transaction information, such as tax amounts, item descriptions, and customer codes that are captured within the Syspro environment.
When processing digital payments using the Payment Gateway, it is mandatory to supply the commodity code against a stock item for a payment transaction to pass the level 2/3 data validation.
This means that one of the following commodity codes must be captured against the stock item on the Tariff Code field within the Sales Order Entry program:
-
HS – Harmonized Commodity Description and Coding System
-
UNSPSC – United Nations Standard Products and Services Code
-
NAICS – North American Industry Classification System
-
NAPCS – North American Product Classification System
-
-
Save your changes.
These settings allow you to add a logo to your payment web page and confirmation emails.
You need to be an administrator to access settings. If you are not an administrator then this section will not be available to you.
To add or remove a company logo follow these steps:
-
Launch to the PayThem dashboard.
-
Navigate to Company Settings.
-
Click the Add Logo option in the Company Logo section.
-
A pop up window will appear allowing you to select a logo from your files.
-
Select your logo file then click Open.
-
You will return to the Company Settings page and your logo will be displayed on screen.
-
Save your changes.
-
To remove the logo, click the Remove Logo icon on the top right of the logo in the Company Logo section.
This allows you to configure certain preferences that affect the way the application works.
You need to be an administrator to access settings. If you are not an administrator then this section will not be available to you.
To configure the preferences, do the following:
-
Launch to the PayThem dashboard.
-
Navigate to Preferences.
-
In the Payment Requests section:
-
At the Default country to display option, select the country where most of your customers are based.
-
The Allow payers to edit payment amounts option lets you select whether you want to allow a payer to change the amount to pay for a payment request.
-
At the Usage type option you can decide if the payment request can be used more than once.
-
The URL link expiration option lets you customize the expiration time for payment request URLs using these settings. By default, payment request URLs are valid for 3 months. To change this, select an interval of days, weeks, months, or years, and specify the desired amount. If you set the interval to 0, the payment request link will never expire.
We highly recommend that your payment requests have an expiry time.
-
-
In the Transactions section:
This functionality is not available for Syspro 8 2025
-
Save your changes.
You can configure PayThem to send you email notifications when certain events have occurred. These events include:
-
Successful payments
An email is sent to all notification users when a payment has been successfully made by the customer.
-
Failed payments
An email is sent when a customer has attempted to make a payment but it failed and no payment was taken.
-
Pending payments
An email is sent when the customer has made a payment, but it is not yet completed as it may require authorization. The payment could be accepted or reject. Either events will trigger a success or failed payment email.
-
Customer notifications are sent automatically.
-
All User notifications are deactivated by default.
-
Notification settings need to be configured for every company you have set up in PayThem.
To configure notifications and add a notification user, do the following:
-
Launch to the PayThem dashboard.
-
Navigate to Notifications.
-
Enable the events for which you want to receive notifications.
-
Select Add notification user.
The Add New Notification User window is displayed.
-
Select whether the new user is a full PayThem user or somebody who will receive email notifications.
-
Enter the new user's email address.
-
Select Add User to save the new user.
This allows you to add, edit and remove users from PayThem. These users are global users and can access every company you have connected to PayThem.
You need to be an administrator to access settings. If you are not an administrator then this section will not be available to you.
To add and maintain users, do the following:
-
Launch to the PayThem dashboard.
-
Navigate to Users.
-
Select the New User button.
The User Details window is displayed.
-
Enter the user's name and email address.
-
At the Role field you can specify one of the following:
-
Administrator
This user can view payment requests and transactions, all customer accounts, banks linked to PayThem payment plans, settlements and late payments.
This user can configure users, company and payment settings.
-
Standard user
This user can view payment requests and transactions, all customer accounts, banks linked to PayThem payment plans, settlements and late payments.
This user can't configure users, company and payment settings.
-
Viewer
-
-
Select the Invite User option to send them an email asking them to accept the invitation to be a PayThem user.
This allows you to setup multiple companies within PayThem.
You need to be an administrator to access settings. If you are not an administrator then this section will not be available to you.
To add a company, do the following:
-
Launch to the PayThem dashboard.
-
Navigate to Companies.
-
Select the Add Company button.
-
Enter the name of the company.
-
Optionally enter the company short name and description.
-
Select your currency at the Base currency field.
-
At the ERP/Accounts Details field, select SYSPRO.
-
The ERP Identifier and Custom Identifier are used to link the PayThem company to the Syspro company, (i.e. it links the PayThem dataset to the Syspro dataset).
You can enter the Syspro company ID (e.g. EDU1) in both fields.
The ERP Identifier is reflected in the Host ID column in the Companieslistview.
The Custom Identifier is reflected in the Custom ID column in the Companieslistview.
-
At the Create Options section you can copy settings from an existing company that you can select from the drop-down.
-
Select the Check box if this is a demo company if the company you're adding is not a production company.
-
Click on Add company to save your changes.
You will return to the Companieslistview.
-
You can click on the Kebab menu in the Actions column of the Companieslistview to edit or delete the company.
The portal accept payments using a variety of methods, including credit cards and bank transfers. These payment methods are provided by payment providers, i.e. an external service that processes the actual payment transactions initiated through the PayThem platform.
To add a payment provider, do the following:
-
Launch to the PayThem dashboard.
-
Navigate to Payment Providers.
-
Select the New Provider Configuration button.
-
Select the available payment provider.
-
Enter the name, description and account details.
-
You can select the Filters button to filter on currencies for card and bank debit payment methods.
-
Select Save Changes to save the payment provider.
Copyright © 2026 Syspro PTY Ltd.