Factory Documentation
Exploring
This program lets you produce free-format documentation from existing jobs, or dummy jobs for finished parts defined within a structure.
This program is accessed from the Program List of the Syspro menu:
-
Program List > Work in Progress > Job Postings
-
Program List > Bill of Materials > Reports
Within SYSPRO a job is equivalent to a works order. Against each job you record what material is required and what operations/instructions must be performed to complete/convert the raw materials into the finished product.
Starting
-
Before you can run this program you need to define a format for your factory documentation using the Factory Documentation Format program.
You can restrict operator access to programs by assigning them to groups and applying access control against the group (configured using the Operator Groups program).
The following configuration options in Syspro may affect processing within this program or feature, including whether certain fields and options are accessible.
The Setup Options program lets you configure how Syspro behaves across all modules. These settings can affect processing within this program.
Setup Options > Configuration > Manufacturing > Bill of Materials
- Structure sequencing required
- Stock control level
-
The Use SQL driver option of the Maintain SRS Document Templates program doesn't apply to factory documentation.
-
The report is only generated when you select to Include stocked jobs and/or Include non-stocked jobs.
-
The document can only be reprinted in the initial document format. Therefore, not all documents for all jobs may be reprinted when selecting to re-print jobs using different document formats.
-
You can only print or reprint confirmed jobs that are not complete.
Solving
This message is displayed when you have done the following within the Factory Documentation Format program:
-
Maintained a document format with an attached XML template and you enabled the Use SRS SQL option at the Preferences window, i.e. you want to print the document using SQL driver, but you have a XML template attached to the document format.
-
Maintained a document format with an attached SQL template and you disabled the Use SRS SQL option at the Preferences window, i.e. you want to print the document using XML driver, but you have a SQL template attached to the document format.
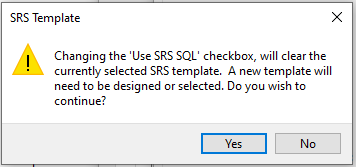
Selecting or deselecting the Use SRS SQL option removes the template from the document format if the template does not correspond with the preference selected, i.e. if you enable the Use SRS SQL option, then the template linked to the document format must be a SQL template and if you disable the Use SRS SQL option, then the linked template must be an XML template.
Select No to keep the previously associated template linked to the document format. This will reverse the preference selection you have made.
Select Yes to remove the previously associated template from the document format. You must then assign a new template to the document format, by doing the following:
-
Access the Factory Documentation Format program, and at the Format options section select SRS options from the list and then select Change.
The SRS Document Print Setup program is displayed.
-
Select Add Document from the toolbar.
The Add SRS Document Templates program is displayed.
-
Select the Browse icon at the Template field.
-
Choose the required template and click on Select.
-
Select Save and Close.
The Maintain SRS Document Templates program is displayed where you can configure template and printer options.
-
Close the program to return to the SRS Document Print Setup program.
-
Choose the template you have added and click on Select to link the template to the document format.
You will return to the Factory Documentation Format program.
To activate printing factory documentation using the SQL driver, proceed as follows:
-
Select the Server-side reporting using SQL or Client-side reporting using SQL option against the Reporting configuration setup option (Setup Options > System Setup > Reporting).
-
Enable the Use SRS SQL option within the Preferences of the Factory Documentation Format program.
-
Assign a SQL template to the document format using the SRS Document Print Setup program.
To print factory documentation using the SQL driver, proceed as follows:
-
Access the Factory Documentation program.
-
At the Format field, select Define format.
The Factory Documentation Format program is displayed.
-
At the Print method field, select SRS document.
-
At the Format options list, select Preferences and click on the Change button.
The Preferences window is displayed.
-
Enable the Use SRS SQL option.
A warning message is displayed, prompting you to confirm whether you want to remove the previously associated XML template from the document format. Selecting Yes will remove the previously associated XML template from the document format.
You must then assign a new SQL template.
To assign a template to a document format, proceed as follows:
-
Access the Factory Documentation Format program, and at the Format options section select SRS options from the list and then select Change.
The SRS Document Print Setup program is displayed.
-
Select Add Document from the toolbar.
The Add SRS Document Templates program is displayed.
-
Select the Browse icon at the Template field.
-
Choose the required template and click on Select.
-
Select Save and Close.
The Maintain SRS Document Templates program is displayed where you can configure template and printer options.
-
Close the program to return to the SRS Document Print Setup program.
-
Choose the template you have added and click on Select to link the template to the document format.
You will return to the Factory Documentation Format program.
Using
-
Columns in a listview are sometimes hidden by default. You can reinstate them using the Field Chooser option from the context-sensitive menu (displayed by right-clicking a header column header in the listview). Select and drag the required column to a position in the listview header.
-
Fields on a pane are sometimes removed by default. You can reinstate them using the Field Selector option from the context-sensitive menu (displayed by right-clicking any field in the pane). Select and drag the required fields onto the pane.
The captions for fields are also sometimes hidden. You can select the Show Captions option from the context-sensitive menu to see a list of them. Click on the relevant caption to reinstate it to the form.
If the Show Captions option is grayed out, it means no captions are hidden for that form.
-
Press Ctrl+F1 within a listview or form to view a complete list of functions available.
Referencing
| Field | Description |
|---|---|
| Print/Send |
This prints the factory documents according to the Report Options and emails the information displayed in the WIP Factory Documents pane. The document preview function is only for documents being printed. Therefore, the preview function is disabled if you selected to email or fax one (or more) of the documents within the batch. |
| Alignment |
This prints the relevant document using test characters to verify that your stationery is correctly aligned in your printer. This typically applies when using pre-printed continuous stationery. |
| This emails the information displayed in the WIP Factory Documents pane, once processing is complete. If you enable this option for a program included in automation, then the workstation running the automation must have MS Outlook installed with an active and working profile defined. |
|
|
Save Form Values |
This option is only enabled in Design mode (Automation Design).
Your selections are saved and applied when the program is run in automated mode. Form values and defaults are applied at operator level (i.e. they are not saved at role or group level). |
These options let you indicate the criteria according to which the factory documents must be generated.
| Field | Description |
|---|---|
| Documents | |
| Document number | This lets you indicate the document number according to which the selected jobs must be printed. |
| Format | this lets you indicate the document format within the document number according to which the selected job(s) must be printed. Only the formats defined against the selected document number are available for selection. |
| Define format | This lets you maintain the document formats for printing your factory documentation. |
| Format description | This displays the Format description for verification purposes. |
| Print type |
This lets you select what you want to print. This lets you print documentation for a range of existing jobs held on file. This lets you print documentation for finished stock codes or subassembly parts held on file. |
|
Existing jobs |
|
| Report sequence |
This lets you define the sequence in which you want to print. This lets you print the documents in job sequence. This lets you print the documents in parent stock code sequence. This lets you print the documents in job classification sequence. |
| Reprint | Select this to reprint factory documents previously printed. |
| Include stocked jobs | Enable this to include jobs for stocked parent items on the factory documents. |
| Include non-stocked jobs | Enable this to include jobs for non-stocked parent items on the factory documents. |
| Include completed allocations | Enable this to include allocations which are complete when printing the factory documents. |
| Include allocations with no outstanding | Enable this to include allocations with zero outstanding against the job when printing the factory documents. |
| Jobs | Indicate the jobs for which to generate the factory documents. |
| Parent stock codes | Indicate the parent stock items for which to include jobs. |
| Job classifications | Indicate the job classifications for which to include jobs. |
| Warehouses |
Indicate the warehouses for which to include jobs. This is the warehouse in which the parent stock code is located. |
| Planners |
Indicate the planners for which to include jobs. This selection only applies to stocked jobs. |
| Job start dates | Indicate the job start dates for which to include jobs. |
| Dummy jobs | |
| Route | Indicate the factory routing to use for dummy jobs. |
| WIP branches | This indicates the Work in Progress branches for which to include jobs. |
| After processing completed |
These options are displayed within programs that can be automated. They let you indicate the action you want to perform once processing is complete. |
Use this grid to indicate the finished stock codes or sub-assembly part currently defined for which you want to print documentation. This only applies when you enable the Dummy jobs option in the Report Options.
| Field | Description |
|---|---|
| Stock code | Indicate the finished item or sub-assembly for the job. |
| Stock code description | Displays the description of the stock code for identification purposes. |
| Rev |
Enter the revision of the finished item or sub-assembly, if the item is ECC-controlled. This is not required when the ECC Stock control level setup option is defined as Stock code. |
| Rel |
Enter the release of the finished item or sub-assembly, if the item is ECC-controlled. This is not required when the ECC Stock control level setup option is defined as Stock code. |
| Job | Enter the job number to assign to the details being captured. |
| Job description | Enter a description for the dummy job. |
| Quantity to make | Enter the quantity of the finished part that must be made. |
| Delivery date | Indicate the expected delivery date for the job. |
| Customer name | Indicate the name of the customer linked to the dummy job. |
This pane displays the results of the processing function you selected once processing is complete (unless you selected the option to close the application from the After processing completed section).
The Work in Progress Allocations table (created at the time of adding a job) is used as the source of information and contains details relating to all the materials and operations required for the assembly of finished parts.
When printing material allocations for dummy jobs, the warehouse defined against the bill of materials structure is printed. If a warehouse is not defined in the bill of material structure for the component, then the warehouse to use defined against the stock code is printed.
If the Structure sequencing required setup option is enabled, the material allocations for a job are printed in the correct structure sequence.
Copyright © 2026 SYSPRO PTY Ltd.